Saturday, November 26, 2016

DIY Hand Soap


With Essential Oils


When looking for a clean soap at the store, it's difficult to find one without unpronounceable chemicals or estrogen disruptors (no thanks!), or dyes, etc.  When I first cleansed my home environment of all the harsh chemicals, perfumes, dyes, and anything I couldn't pronounce because it was causing me to have hives and a host of other health issues, I had to look for alternatives for my personal care.  I found that making hand soap is super easy, and most of us already have the ingredients in our home (go us!).


Ingredients


  • An old hand foam dispenser bottle (the hand foam one helps mesh the oil and water better, leaving us with that lovely sudsy feel/look that we all love rather than than just a regular pump bottle.  If you only have a pump bottle, then it will work, you just have to shake it up before each use).
  • 1 tsp C Baking Soda
  • 1/4 C Oil (Almond, Jojoba, Coconut, Avocado or Olive Oil are my personal favs.  I'd avoid canola oil as it's most like rancid or heated too high and changed the nature of the oil).
  • 1/2-1tsp Vitamin C (Citric Acid) - This is optional.  The Vitamin C helps to preserve the oils/soap.  I find that one foaming bottle can last for about 3-4 weeks.  
  • 25-30 Drops Essential Oils - I just made a batch using Wild Orange (10 drops), Lavender (10 drops), and Geranium (5-10 drops).  It smells wonderful!  The Lavender and Geranium (besides being gang-busting antibacterial oils, they are also wonderful for the skin.  They can clear up rashes, help with burns, soothe the skin, and promote healthy skin.  It's a win win!).  The Wild Orange falls in the citrus family and is known to help disinfect, cleanse, and leave your skin and body with a fresh smell, as well as promoting a healthy immune system.  (Gotta love that!).  People ask me all the time which oils I use, and personally, I use the doTerra brand of oils.  I'm not a big fan of network marketing, but I've experimented with many brands, and have found that doTerra is the one that works with my body and skin.  I have a super sensitive body, and all the other oils I've tried have left me with massive headaches and/or hives.  I also love doTerra's co-Impact sourcing (helping the suppliers with fair pricing and the ability to help their culture and area really thrive), as well as their research, service to third world countries, and how they've taken the knowledge of essential oils to the world.  I have many massage therapy colleagues that love the Butterfly, Native American, or other brands and have great success with them as well.  Our chemistry is all unique, so find what works for you.  (I'd avoid the oils sold at the health food stores, as they often have a lot of fillers that are rancid, or made using harsh solvents/chemicals.  I'd also avoid purchasing oils off of Amazon as the bottles can be tampered with easily, leaving you with who knows what inside the bottle).      

Instructions

Mix all the ingredients together and then fill the rest of the bottle with filtered or distilled water.  Pump away!


Tuesday, November 8, 2016

Hawaiian Haystacks

Dairy-Free, Egg-Free, GAPS-Friendly, Gluten-Free, Grain-Free, Paleo, 
SCD-Friendly, Soy-Free, Sugar-Free 


One of my favorite meals growing up was my Mom's Hawaiian Haystacks, but it was made with cream of chicken (lots of dairy) and rice, so I wanted to make a more gut-friendly version.  I did make quinoa, so if you're strictly paleo, then you could use cauliflower rice or zoodles, or some other squash/veggie base.  The great thing about this meal is you can pull out all your leftovers in the fridge, or any produce that needs to be used up.  What makes this an amazing tasting meal is it's balance of sweet, sour, spicy, bitter, and pure deliciousness.  Traditionally, my mom would add in tomatoes and colored peppers, but since they flare up my autoimmune issues, I didn't add them here.

Instructions
For the Gravy/Sauce:

1 medium Onion (diced)
* 1/2 package Mushrooms
1 TBS Grass-fed butter or Oil (coconut, olive,
           or avocado oil)

Saute onions and garlic in butter/oil for 5 min. and Add:
1 can full fat coconut oil (or almond or other nut/seed milk)
1 C Chicken or Bone Broth
1-2 TBS tapioca starch (can use 1 TBS guar gum, 2-4 tsp xanthum gum, arrowroot powder, or almond flour to help thicken)
Season with Salt and Pepper and other favorite herbs and spices (I added about 2 tsp Herbs De Provence as well)

To serve, add the gravy on top of gluten-free grains or paleo zoodles, cauliflower rice, or sweet potato and dice up and top with any of the following mix-ins (feel free to get creative):

Green Onions (chopped)
Olives
Carrots
Celery
Cilantro (or Parsley, Dill, or other fresh herb)
Chives 
Coconut flakes
Dried Fruit (raisins, figs, apricots, cranberries, 
                                                                                    blueberries, etc.) 
                                                                                    * Tomatoes
                                                                                    * Peppers 
                                                                                    Apples 

 * If you're struggling with an autoimmune issue or gout, you can leave out the nightshades (tomatoes, peppers, and even leave out the mushrooms) to help alleviate symptoms.  


Monday, November 7, 2016

DIY Yoga Mat Spray


Whether your into Yoga, Pilates, Stretching, or some other exercise, I'm sure you've experienced grabbing the mat and having your nose overwhelmed by dried sweat and bacteria (sexy, don't you think?).  Just how you want to start your workout!

While I don't consider myself a huge germaphobe, I do like to know that things I use are relatively clean. This spray is something I use on my yoga mats, exercise equipment, (and I even use it on the mats at the gym).  The natural antibacterial properties of the oils leave the mats germ-free without destroying my natural healthy bacteria.  Plus, it leaves everything smelling so good while I hit the mat!

Ingredients

1 C Distilled Water (or Clean Filtered Water)
1/4 C Vinegar
15 Drops Melaleuca (Tea Tree) Essential Oil
10 Drops Lavendar and/or Lemon (or any Citrus) E.O.

Pour into a spray bottle and spray away the germs (and smell!)

Saturday, July 23, 2016

Good for the Soul Chicken Zoodle Soup

Dairy-Free, Egg-Free, GAPS-Friendly, Gluten-Free, Grain-Free, 
 SCD-Friendly, Soy-Free, Sugar-Free


Today has been a particularly busy day, so by the time I realized it was getting close to dinner, I needed something quick.  We had a whole chicken that we cooked the other day, so we had some leftover meat. My mom has been craving chicken noodle soup lately, so I made a chicken zoodle soup instead. It turned out so delicious and so good for the soul!

Ingredients:
4-5 Cups chicken broth + extra water to cover all the veggies 
1 medium onion, diced
1-3 cloves of garlic (depending on how much you love garlic. I love it, so I used 3), diced
Fennel, cut into lengthwise pieces 
3 medium carrots, chopped
Zucchini (spiralized into noodles- You can also chop them or cut into long strips, however you prefer them. I was re-creating the noodles, so I used a spiralizer. Some Cuisinart or KitchenAid attachments have one that makes veggies into tiny strip/noodle-like shapes)
3 Stalks of Celery, chopped
1 1/2 C Butternut squash (optional), cut into small squares
Leftover baked Chicken (cut into small pieces)
Optional: Add any other veggies that you desire. Peas, Rutabaga, Any other variety of Squash,
Potatoes, Brussel Sprouts, etc.

Directions:
Saute the diced onion, garlic, and fennel in some coconut or olive oil until translucent (about 5 min). 
Place the sauted veggies in with the rest of the ingredients and cook over medium heat until veggies are tender. Salt and pepper to taste.
Enjoy!

Wednesday, May 4, 2016

Creamy Mushroom and Carrot Chicken Dinner

Dairy-Free, Egg-Free, GAPS-Friendly, Gluten-Free, Grain-Free, Paleo, 
SCD-Friendly, Soy-Free, Sugar-Free 

Remember the Cream of Chicken/Mushroom cans that would be poured over chicken, baked, and used as a gravy? Today I was reminiscing on the yummy creamy chicken dinners that my Mom used to make, and I was in a pretty creative mood.  I've also been going through a serious mushroom craving binge, so this is my take on a Cream of Mushroom and Chicken dinner that is Gut-Friendly.  It tastes nothing like my Mom's chicken gravy dinners, however it is absolutely delicious!  I truly savored each bite!  

If you are following a FODMAP diet and have problems with onions, garlic, or mushrooms, you can leave them out and substitute leeks for onions, or add 1 1/2 Cup vegetable broth that works for you.  I haven't been able to handle most of the starch thickeners, so I ended up adding 1/4 C almond flour afterwards to thicken it.  If you want to have a thicker sauce, then you can add 1/4 C Arrowroot or Potato starch, Coconut Flour, 1-2 tsp Xanthum Gum, Gelatin, or some other preferred starch/thickener.

 Ingredients
3 Carrots
1 Onion
1-3 Clove(s) Garlic (depending on taste preference)
1 Can Coconut Milk (or 2 Cups Nut/Seed Milk)
1/2 C Water
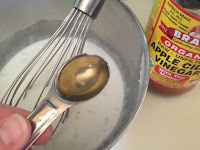
1 tsp Apple Cider Vinegar
1 tsp Salt
1/2 tsp Pepper
3 Leaves Fresh Basil (or 1tsp dried Basil), chopped
1/2 pkg Mushrooms (optional), chopped
3-4 Chicken Breasts
Thickener of choice (see notes above)


Directions
Dice together: (or use the food processor)
Carrots, Onion, and Garlic. Saute these in
a pan with 1TBS coconut oil and the Chopped
Mushrooms for 5-7min (or until soft).

In a separate Bowl, combine: Coconut Milk,
Water, Apple Cider Vinegar, Salt, Pepper, and Basil.
Mix well.  Then add the saute Carrot
mixture to the bowl and mix evenly into the sauce.


Place the Chicken Breast in a pan (8x8 works well)
and pour the sauce over the chicken.  Cook at 350
degrees Fahrenheit for 45min-1hr (or until chicken
cooks to 180 degrees). Enjoy with Steamed Veggies or a Green Salad!

*Note: If you or your kids don't like chunks of food, instead of using the food processor, you can blend the carrots, onions, garlic, and sauce for a more creamy option.

Wednesday, March 16, 2016

Chocolate Ginger Spice Cake


Gluten-free, Grain-free, Dairy-free, Soy-free, Egg-free, Tomato-free,
Sugar-free, GAPS-Friendly, SCD-Friendly, Paleo


I was craving Ginger and Chocolate, so I decided to make a cake. I was super happy to find some eggs at the Health Food Store that I can eat that don't upset my tummy! They are pastured eggs by Vital Eggs. The insides are more orange (how eggs used to look years ago without all the grain-feed, antibiotics, pasteurization, bleaching, and who knows what else they do....). If you can't do eggs at all, then follow the substitutions below. I hope this hits the spot the same way it did for me!

Ingredients
1-1/2 C Almond Flour (you can also use 1 C protein powder with 1/2 C coconut flour instead of using nut flours)
1/4 C Cocao Powder (Omit if following the SCD. The cake still tastes amazing without cocoa).
3 tsp Cinnamon
2 tsp Ginger (I like a lot of ginger, so if you prefer it more light, then use 1 to 1-1/2 tsp)
1/2 tsp Cloves
1/2 tsp Nutmeg
1/4 tsp Cardamom (optional)
1 tsp Baking Soda
1/4 tsp Salt
1 tsp Apple Cider Vinegar (Preferably ACV that still has the Mother in the bottom.)
1/2 C Apple Sauce (optional)
1/4 C Raw Unfilterd Honey or Maple Syrup (If you don't do sugar, then start by adding 7-10 drops of liquid stevia and add one drop at a time to taste, or 1/4 tsp of powdered stevia at a time until desired taste. It will sweeten a little with baking, so go light on the stevia. You can also use 1/4 C Lankanto instead of honey or stevia if you prefer. Lankanto Monk Fruit doesn't have the aftertaste that stevia does. My stomach doesn't do well with Monk Fruit, however most do just fine).
3 Eggs (Pastured preferred. If you can't do eggs, then substitute 1/4 C Arrowroot powder, or 1/4 C ground chia plus 1/4 C Ground flax seed soaked in 1/2 C water for 5min. If using the chia/flax blend, you may want to add in 1/4C protein powder to help the consistency so it doesn't fall apart too easily. I like the SunWarrior Pea or Fermented Rice Protein blend).

Directions
Preheat oven to 325 degrees F.
Combine all the dry ingredients and mix together well. Set aside. Combine all the wet ingredients into a mixing bowl and mix well. Then add the dry ingredients to the bowl and mix well. Pour batter into an 8x8 greased pan. (If you're not using eggs, then line the pan with parchment paper so the cake won't stick to the pan). Bake at 325 degrees F for 25-30 min (or until a toothpick comes out clean).

Enjoy with a glass of coconut or nut milk, dollop of refrigerated coconut milk cream, or homemade ice-cream. It's also great all on it's own!